Friday, October 30, 2009

Summary of Holts tour of Portugal and Spain


Jan and I often thought about visiting the battlefields of Portugal and Spain, particularly as our Waterloo holiday in 1971 had been so enjoyable. We had always been put off by the difficulty in researching how to explore the battlefields, and our complete lack of Spanish or Portuguese.


Whilst living in Germany we had visited quite a few battlefields. Some, like Verdun, had been easy to explore. This battlefield is a national monument for the French, and there are lots of books available about the battlefield itself. It is also very well sign posted.


Others, like Minden, had proved difficult in the extreme. We lived quite close to Minden, and after our Waterloo holiday had tried to explore Minden battlefield armed with a book of the battle and a modern day map. It had proved a complete failure.


Then one day in 1991 I found out about Holts Battlefield Tours. I had heard of them before and knew they specialized in visiting World War One and World War Two battlefields. But they were now doing Portugal and Spain. They were not cheap, but it was the opportunity that was too good to miss.


They did three tours. The first was Portugal, the second Spain and the third the Pyrenees. We would have liked to do all three, but could not afford that. So we choose the one which offered the best selection of battlefields. The tour would last seven days from 21 to 28 October 1991, and would visit 10 battlefields and let us visit both Lisbon and Madrid.


It was an excellent tour and proved very good value for money. Most important of all, it would give us the confidence to return to Portugal and Spain and “do our own thing”.


The next blog will deal with our return visit to Portugal and Spain to explore more of Wellington's Peninsular battlefields, this time on our own.


You can read about it at:

http://morewalkingportugalandspain.blogspot.com/


Tuesday, August 25, 2009

Madrid


Our last night was spent in Madrid. Lovely hotel, like all of the rest, and excellent location – right in the centre of the city. However we were both too tired to take advantage after such a hectic week.


Holts Battlefield Tours are not a cheap way to visit battlefields, but I must admit that our tour from 21 to 28 October 1991 was definitely very good value for money.


We had visited the cities of Lisbon, Salamanca, Toledo and Madrid. More importantly we had visited the Napoleonic period sites of Elvas, San Christoval, Badajoz, Albuera, Alcantara, Cuidad Rodrigo, Almeida, the bridge on the river Coa, Fuentes de Orono, Salamanca and Talavera.


Not bad for 8 days, which included flying to Lisbon and back from Madrid.


The disadvantage, for me, was the limited amount of time available at each site. I always felt that I would have liked another hour or so at each one. There was also the frustration of always being in a large group, where the desires of the individual must always take second place to the needs of the group. And I have no doubt that most of my fellow travelers would feel that they had sufficient time at most, if not all, locations. After all most of them were regular Holts Tour travelers and this was just another holiday. For Jan and I it was much more than that.


This holiday had given us a taste for visiting the Peninsular Battlefields. We had not done all of them, but we had done a lot. This was one of two coach tours to Portugal and Spain organized by Holts, and Jan and I were anxious to see more. We were not sure whether we wanted to see more with Holts or on our own.


An organized coach tour is an excellent, and very easy, way to visit battlefields. No preparation is required, no maps are needed, it is not even necessary to know anything about the site you are about to visit. Someone is on hand to explain what battle took place at each stop, to point out the sites of particular interest and to answer any questions you may have. It is not necessary to find either the next battlefield, or the next night’s accommodation. It is not necessary to communicate with foreign people who speak a strange language. Everyone speaks English, or there is always someone on hand who can do so if needed. I was well aware that it would be a completely different ball game if we were to do it on our own.


On the other hand there is not the same excitement or satisfaction to be taken to the middle of a field in a luxury coach as there is to find a spot all on your own where an incident took place which you have read about in a history book. Or to have as long as you want to explore a location. To sit and read and to soak up the atmosphere.


From the moment we returned to UK we were quite sure that we would return to the Peninsular battlefields of Portugal and Spain. What was not sure was whether it would be on another Holts coach tour or under our own steam.


Monday, August 17, 2009

Talavera

The battle of Talavera was fought on 27 and 28 July 1809. It should be an easy battlefield to find and explore, because as you can see from the map above it runs between the town of Talavera and the mountains to the north. Also there appears to be a road running directly to the mountains.

However there is now a large motorway through the centre of the battlefield and much of what is left is now private land.

I will describe the battlefield in the order in which we visited the various locations.


We were fortunate to have as our special guide the military attache at the British Embassy in Madrid. He was a colonel in the British Army, but I cannot remember his name. The battlefield is close to Madrid, and he had visited it many times and made a special study of the battle. We met him at the side of the river Alberche just outside Talavera


The bridge over the river Albereche was not used during the battle, but the river was crossed by the French infantry on the first day when they caught the British by surprise and almost captured Wellington, or Wellesley as he was then, at the casa de salinas.

We then drove to the new monument. The original is on top of the Medelin, which is now private land. When the road was built through the battlefield this new monument was built. Holts is a very military influenced tour company, and our guide laid flowers at the monument.


We found the monument to be a pretty soulless sort of place. Modern and impressive but it did not seem to capture the essence of a napoleonic battlefield - at least for Jan and I. However nearby there was a lovely picnic spot. Meals are something Holts Tours do really well with, and this was no exception. On the coach were a picnic lunch for each of us in a hamper with a small bottle of wine each. Pretty impressive. From the picnic site we could see this large building which was used as a hospital during and after the battle. I believe there were many such, including a large church in Talavera itself.

After lunch the coach took us to the Medelin. This is the hill at the left of the allied position which was held by the British throughout the battle. It is now private land, and a wealthy Spanish gentleman has built this impressive villa right on top! Obviously no problem with building permission here apparently.

Again Holts Tours came into their own. They had obviously arranged permission for us to visit, and the large gate was opened by the owner himself, who exchanged greetings and a large bottle of something nice changed hands. He then took us on a tour of the Medelin.


First stop was the original monument. To my mind this is much more in character than the ugly new one a few miles away. Behind Jan is the new villa. We were quite surprised to find that the building did not affect the hill too much, and the views not at all. Nothing like The Lion at Waterloo.


The owner, accompanied by his dog, showing some of our group around the top of the Medelin. There appeared to be work in progress, but I have no idea what. And I now know that unfinished projects is nothing new in Spain.


Walking to the the north side of the Medelin we had a great view of the valley between the hill and the mountains. This is the area of the British cavalry charge which ended in disaster when they encountered a dip which caused many casualties to both horses and men. One French attack on the hill was down this valley, but like the others it was beaten back.


The Portina stream marked the line between the French and British positions. The French were to the left, the British to the right. On the day we were there it was completely dry and looked could only be distinguished by the line of trees. This is the area where the French advanced to engage the British infantry and were beaten back. The British followed them over the screen and were in turn routed by the French reserves. This incident almost cost Wellesley the battle.

This is a view of the Medelin from the centre of the British line. The photographs is looking along the line of the Portina brook, so the British would be on the left and the French on the right.

The building is the casa de salinas, taken from the British side. This is the building where Wellington was almost captured by the French on the first day of the battle. There are two stories to explain why he was there. The first, and least likely, is that he was friendly with the wife of the owner.

The second, and much more likely, reason is that he was in the tower looking for the French through his telescope. There is a line of trees between the villa and the river Alberche, and it is said that this is the reason he did not see the approaching enemy. The story goes that as they entered the front door, he ran down the stairs and rode his horse out of the back gate.

The river Tagus just outside the town of Talavera. It played no part in the battle as the French had crossed it well to the west and approached the allied position beyond the river.


From just north of Talavera we could see the Cascajal, this is on the French side of the battlefield and is a slightly smaller hill immediately opposite the Medelin. In the foreground is the area where the French deployed and launched their attacks on the allied line.

This is the Medelin from just below the Cascajal. This is the view the French infantry would have had of the Medelin as they advanced in mass columns.

Looking towards Talavera from the Cascajal. The whole French army would have been deployed on the left of the photograph, and the British and Spanish on the right. The British would be nearer and the Spanish just to the north of the town.

Another view of the Medelin from just south of the Cascajal. The French columns would have moved from the right of the photograph. You can see that the hill would not have been very difficult to climb.


From the Cascajal we drove to the mountains to the north of the city, just the other side of the valley where the British cavalry charged. These hills were held by the Spanish, and did not feature in the battle. But they provide an excellent view of the whole area towards Talavera. It was from here that the local civilian population watched the battle. The hill in the foreground is Medelin.


Another view from slightly higher up the mountain, looking towards Talavera. The road in the middle ground is the new motorway, cutting through the battlefield. The French were on the left, the British on the left.

Saturday, August 8, 2009

Salamanca

Our first view of the battlefield was from just outside of Calvarassa de Ariba. Jan and our guide Julia Page are well wrapped up, because it was a very cold morning. It would be difficult to find a better spot to view the battlefield.

I like this map, because it is not cluttered and gives you a very clear idea of the battlefield. The Arapiles is 6 miles from the city of Salamanca. About half way down the map, on the right, is our first viewpoint at Calvarassa de Ariba. The Lesser and Greater Arapiles are just below together with the village of Los Arapiles.

This photographs was taken from the view point at Calvarassa de Ariba. The Arapiles are in the plain with the Greater (French) on the left and Lesser (British) on the right. This would have been what Marshal Marmont saw on that morning of 21 July 1812 as his troops raced to reach the Greater Arapiles ahead of Wellingtons men. From here he would have seen the two armies marching down the valley, French on the left British on the right.


After half an hour on the viewpoint we were all frozen, and glad to head for the only restaurant in the valley, just outside the village of Los Arapiles. Over a welcome hot cup of coffee we were told that this was the location where Wellington was having breakfast of chicken leg when he was told that the French had overextended themselves in trying to outmarch the British. He is reputed to have said "By God, that will do" as he threw away his chicken leg and rode off to issue orders for the attack on the French.


Jan and I sitting in the garden where Wellington is said to have received news of the French error and where he decided to order the attack. No idea whether it is true or not, but it is easy to believe as there is a good view of the battlefield from the garden, and there are no other substantial buildings nearby.

This is the view from the outskirts of the village of Los Arapiles looking towards the two Arapiles - Lesser on the left and Greater on the right. You can see how flat the plain is, and how these two strange hills are like islands in the middle of a flat sea.

Looking towards the Greater (French) from the Lesser (British). The buildings in the centre are an abandoned railway station. The Lesser is the smaller of the two, and more rounded than the Greater, which looks like a wargames hill with its flat top. Apparently the British got one gun up on the Lesser, which must have been quite a job.

This was the end of the tour, and the coach was heading back to Salamanca for a free afternoon to explore the city. I wanted to stay and see more of the battlefield, but was told that I would then have to make my own arrangements to get back to the city. The landlord had told us that there was a regular bus service, so Jan and I decided to stay and explore some more.

We walked across the valley towards the Greater Arapiles. This is the view from the bottom, and the monument on the skyline is the centre of the hill. This is where the Portuguese attacked the French. They were not allowed to load their muskets, in case they would stop to fire and then refuse to advance. However when they reached the hill, they found it too steep to advance up, and they had to break ranks and scramble up the wall like rock. As they did so the French lined the top and fired down into the helpless mass. Not surprisingly the Portuguese broke and ran back, followed by the French.

Sitting on the top of the Greater Arapiles there is an amazing view of the whole battlefield. This is the spot where Marshal Marmont was wounded at a critical point in the battle.

A view of the Lesser Arapiles from the Greater Arapiles. Reports of the battle state that Marmont was mislead as to allied intentions because he was unable to see what they were doing. Yet this hill was held by the French throughout the battle, and its hard to see what would have hid the British and Portuguese from the French.

Having spent a full day walking the battlefield, we returned to the restaurant for a coffee and snack. In broken English the owner directed us to the bus stop, which we found without difficulty. He had told us there was a bus every half hour, but after a good half hour wait we were cold and decided to start walking, and flag down the bus when it came. It was a long 6 miles, especially after a full day walking the battlefield, and not a single bus passed us throughout the journey. However it was well worth the effort to spend an extra four hours walking the battlefield. At least I thought so, not so sure about Jan!
Sunday, August 2, 2009

Fuentes de Onoro

Of all the battles I had read about in the Peninsular Wars, the one at Fuentes de Orono has always been one of the most vivid. The battle was spread over three days 3-5 May 1811, and is famous for the fighting retreat of the Light Division and the famous "charge" of Ramseys horse artillery. But for me the most memorable was the hand to hand fighting in the village itself which has always made the most impression.


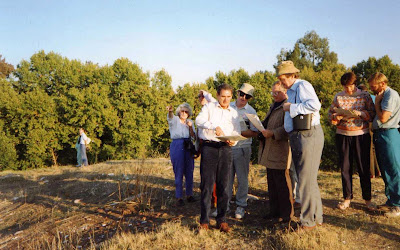
We drove to Fuentes de Orono from Salamanca, and the bus deposited us by the stone bridge over the river Dos Casas. Here we were briefed on the battle, and the left to look around as we wished. Jan and I remained at the bridge for a while as the rest made their way up to the church at the top of the village. We wanted to have a few minutes on our own to just stand and look. The houses on the far side of the bridge and river was the edge of the British defences, and we stood where French attack after attack was launched.

We slowly made our way up through the tangle of narrow streets to the surprisingly large church at the top of the village. This was the furthest the French had advanced. "The Highlanders disputing every foot of ground, had been driven to the churchyard where they fought hand to hand with the grenadiers...." They never managed to take the church, and time after time they were pushed back down the narrow streets to the river and bridge.

The narrow streets and stone walls looked exactly as I had imagined they would. I understand that the village was largely destroyed during the battle, and rebuilt afterwards. But it was easy to imagine that it must have looked just like it does now.

There are many descriptions of the hand to hand fighting in the village. I remembered one in particular "....in their flight about 150 of the Imperial Guard ran down a street the farther end of which had been barricaded by our troops. Shut up in a complete cul-de-sac the result may be imagined - a frightful slaughter...."


Walking down the dirt tracks towards the river it was all to easy to imagine just what it must have been like for both French and British during the endless hand to hand fighting that raged in this small village for hour after hour.

Saturday, July 25, 2009

The Coa

The bridge over the river Coa is about a mile from Almeida. You go down a steep and curving road and cross the dry river bed of the Coa on a new road bridge. However a few hundred yards away is the original bridge, where Crauford almost lost the Light Division on that fateful morning of 24th July 1810.

The Light Division was deployed on the right bank of the river Coa maintaining contact with the garrison of Almeida. Wellington suggested that they withdraw to the left bank, but Crauford was confident he could remain a little longer. On the morning of 24th July he was suddenly confronted by the 24,000 men of Marshal Ney's VI corps.

The Light Division were bundled down the road and nearby hill towards the river, hotly pursued by the numerous French. When they reached the bridge, they realised that part of 52nd were still on the French held bank, so they had to recapture a hill overlooking the bridge.

Once they retreated over the bridge they were safe. The French lost heavily in attack after attack over the narrow bridge, which was easily defended by the riflemen scattered over the rocky hill on the left bank.

It was not a battle, only a Combat of the Coa. It could easily have resulted in the destruction of the famous Light Division. There was much criticism of Crauford, but Wellington defended him as "his intentions were good".

Like many rivers in Portugal and Spain, the Coa is dry for much of the year. When it does rain, it quickly fills and becomes a raging torrent. You can see from this photograph how wide the river is at this point. At the time of the battle the river was in full flow

We only had half an hour to explore the area around the bridge. Because the new road is out of sight, it is very quiet around the bridge now, and possible to explore as much as you like. Even with the river bed dry it was very difficult to cross other than by the bridge.

Saturday, July 18, 2009

Almeida

Almeida is to Portugal what Cuidad Rodrigo is to Spain, it is the fortress which guards the northern corridor. As such it played an important part in the Peninsular Wars. It is perhaps best known for the French siege in 1810, when one of the first shots fired caused a chain reaction resulting in the destruction of the fortress. The cathedral contained the central powder magazine. A lucky shot led to a chair reaction which caused the magazine to explode. The cathedral ceased to exist, the tops of houses throughout the town were sheared by the explosion as if by a knife. The outer walls suffered little, but 500 Portuguese solders were killed in an instant. The garrison surrendered the following day.

This is the same explosion which Sharpe escaped by hiding in a bread oven in Sharpes Gold!

Almeida is only a few miles from Cuidad Rodrigo. It is a slightly larger fortress, and even better preserved, as can be seen from the photograph above. However whereas Cuidad Rodrigo is a bustling town full of life, Almeida has the feel of a deserted place, almost a museum. There are people living in the town, but it seemed unnaturally quiet when we were there, even though it is a popular tourist attraction. And perhaps that is the problem, it has the feel of a National Trust village in UK. Almost as if it is preserved for tourists to come and wonder at.

This bridge is still the main entrance, indeed I believe the only entrance, to the town. Clearly very little has changed since 1810, although all signs of the explosion have been removed - except for the site of the cathedral. It is a flat area at the top of the town, and looking at the town you an easily imagine how the explosion would have removed the roofs of the houses, but gone over the top of the walls.

This rather pretty post card of Almeida sums it all up for me. A picturesque old fortress suitable for coach parties to spend half an hour or so. Nothing wrong with that, but it seemed to lack character or personality. Or perhaps it was just my mood on the day we visited?

Not so in fact. We were to return a few years later and spend a night in the Paradore, and were left with a very similar impression.

The streets can have changed but very little since 1810. You an almost imagine Sharpe and Harper arriving with the gold on their way to report to the garrison commander! This is the main street and on the left are the casemates. They are kept locked, but opened for coach tours. It was a very dark and dank sort of place, as you would expect. The floor was covered with heaps of rusting cannon balls. You wonder why the magazine was not stored in the casemates, which I imagine would be the natural place for it.

The original barracks. Unfortunately we were not allowed to look around, not sure why. They did not seem to be occupied or in any way lived in.

Proof that there are occupants of Almeida. Its just a little surreal that they were using donkey transport. Again shades of Sharpe and Harper.

I feel Almeida should be a lot more interesting than it was. I have struggled to explain why it was not so and feel that I have failed. It would be interesting to hear from anyone else who has visited to know whether they felt the same.

Saturday, July 11, 2009

Cuidad Rodrigo


In my diary I wrote "Cuidad is exactly like I imagined it would be". That really sums up Cuidad Rodrigo for me, both this first visit and our subsequent, much longer, one. If I had to recommend just one location of the Peninsular War to visit, it would probably be Cuidad.

We arrived in Cuidad about 7pm, feeling quite weary and stiff after our long coach journey. We were delighted to be told that our hotel would be the castle of Cuidad Rodrigo. The very place where the French surrendered. There is some dispute about who actually received the surrender, junior officers of both the 52nd and 88th claimed the honour, but no dispute but that it happened in the castle. When the town was stormed, the governor and his staff sought refuge in the castle. Shortly after the British arrived and he handed over his sword.

The castle is now a state run hotel. In Spain there are a number of these hotels called Paradores. They are often historical buildings, such as castles, which have been renovated to a very high degree and turned into 4 or 5 star hotels. The castle of Cuidad Rodrigo is one.


Walking around the castle/hotel is looked like any other luxury hotel. But in the grounds outside it was very easy to imagine the events of January 1812 unfolding.

Whilst everyone else was making their way to their rooms, Jan and I went for a walk around the town. First we walked around the town walls. They are very much as they were in 1812, and you can still walk around the whole circumference. On this evening we seemed to be the only ones doing so. It was quite dark as we started our walk, and one could easily imagine a French sentry doing his rounds and listening for the first sounds of the British approach.

The next morning we had an even greater treat. Our guide spoke to the receptionist and obtained the key to the castle tower. We climbed to the top and had the most magnificent views of both the town and the surrounding area. The town also looks much as it must have done in 1812, particularly the cobble streets in the tiny market just below the castle.


Gathered on the castle tower we had a briefing on the siege and the subsequent storming. It was easy to follow the sequence of the siege, and why the Tesons has been chosen to commence the bombardment. It was also easy to under the layout of Cuidad Rodrigo. We were told, and I find it easy to believe, that the narrow streets of the old town can be negotiated using early nineteenth century military maps.


It was not time to have a guided tour of the town walls. We followed the route Jan and I had found the previous night. It was easier to find the landmarks outside the town in daylight, and we stopped to pay respects at the point where Black Bob Crauford was buried. He was killed leading the Light Division and buried in the Lesser Breach. It was impressive doing this tour, but did not have the same impact as walking the walls with Jan the previous evening, when we seemed to be accompanied by the ghosts of those brave men.

A striking photographs of the Roman bridge over the river Augeda, and the towering castle beyond. During the battle the Portuguese stormed over this bridge to join the storm of Cuidad Rodrigo.

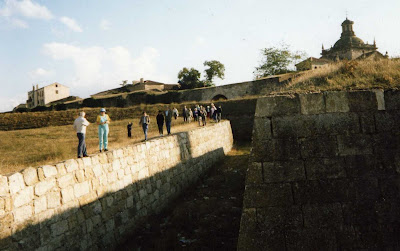
Our group inspect the defences from outside the town. This would be the approximate site of the Great, or Main, Breach. If you inspect the stone work closely you can easily see the new stones which repaired the damage done by Wellingtons artillery.


Another view of the Greater Breach. From this angle you can see just how high it was once you were in the ditch. There would have been a rough rampart of rubble to climb up, but it would have been difficult to climb, and strongly defended by the French.

This view is from the approach to the fortifications. you are looking at the sloping bank of earth which deflected the artillery fire and protected the wall behind. Between here and the wall would be the ditch shown above. There is much damage to the church tower from cannon balls fired during the siege. The British gunners used the church tower as an aiming point.

It is a great, and humbling, experience to walk around the fortifications, climb down into the ditch and consider the courage needed on that night in January 1812. On this visit we did not have photo copies of descriptions of the storm, as we would on a later visit. But we knew the story only too well, and we had been well briefed before being left to explore on our own. No one objected to us climbing down into the ditch, to sit and picture in our minds eye what had happened in this very spot all those years ago.

Jan sitting on the edge of the ditch. We were allowed about half an hour to walk about on our own and study the ground and the defences at our leisure.

Having studied the walls and defences it was back on the coach for the short drive to the Great Teson. It was just as well we were taken there, for I suspect it would have been difficult to find on your own amongst the many houses that now cover the area. I don't really know if this was the actual sight of the first battery, but it looked like it could well be.
You can see that at this angle it was possible to fire over the defences and hit the wall near the church. This weakness was known to the garrison, and they had built a redoubt which had to be taken before the guns could be sited.